The PARTNER Tool is a survey and network analysis tool that helps measure and analyze the quality and structure of inter-organizational networks. Using PARTNER data, network managers can be more strategic in how they build, manage and evaluate their networks to improve processes and outcomes alike.
As the product manager of the PARTNER tool, I field a lot of questions about how to design network surveys. From simple questions about who to include in the respondent list, to more complex situations like how to customize your survey to meet your needs. However as with any tool, there can be a bit of a learning curve when you are first starting out. If you’re thinking about using the PARTNER Tool but haven’t launched your survey yet, I put together this list of tips and best practices to make the most of your analysis before you get started.
To learn more about using the PARTNER Tool, click here.
Here are our 8 tips for better PARTNER Tool survey design!
1. WHAT DATA DO YOU NEED TO TELL YOUR NETWORK’S STORY?
Try to think about 1 to 3 overall questions you want to answer with your data at the end of your study. These questions will help you as you modify your survey, analyze your results and tell your story with your PARTNER data.
2. BE THOUGHTFUL AND INCLUSIVE IN YOUR RESPONDENT LIST.
It is important to include all organizations who “sit at the table” on the respondent list and only one contact per organization to take the survey.
3. ONE NODE OR TWO?
If more than one person sits at the table representing the same organization, think about if you need the organization to be represented in the network maps as one node or multiple nodes. Do the multiple contacts represent the organization in UNIQUE ways at the table (multiple nodes) or do they represent the organization in the SAME way (one node). If multiple nodes, you will need to differentiate the long and short names for all duplicate organizations.
4. IS YOUR ORGANIZATION A PART OF THE NETWORK?
PARTNER does not automatically add the manager’s organization to the respondent list. If your organization is involved in the network include it in the respondent list. If you are an outside evaluator and not a part of the network, do not add your organization to the list.
5. WHY USE GROUPINGS?
When filling out the respondent list you may wonder what the column “groups” corresponds to in the analysis. Groups show up in the network visualizations by either color or shape. You can draw maps showing all groups at once or choose to show only a handful of specific groups. For example, you want your data to show how the network works across domains. With your PARTNER data you could visualize maps showing specific domains and what activities they are working on together.
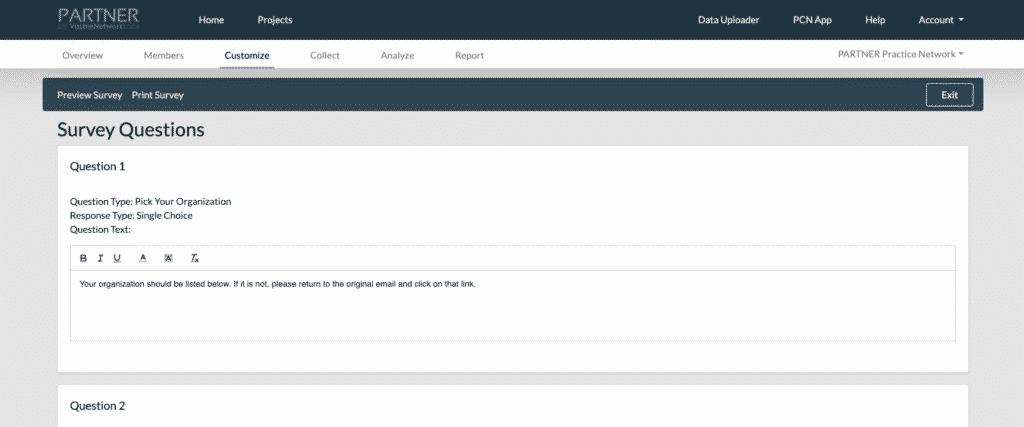
6. MODIFY YOUR SURVEY!
The default survey is meant to be used as a starting place for you and does not have to be survey you send out. Modifying the survey makes it more meaningful for the respondents taking the survey. If you modify nothing else, at least add specific contributions for questions 4 and 5, specific outcomes for questions 6 and 7, and add the network’s name to any question that says community collaborative.
7. WHAT DO YOU WANT TO KNOW ABOUT YOUR NETWORK’S PARTNERSHIPS?
You have the ability to ask 2-3 relational questions in your survey, so what do you want to know about the network partnerships? You could find more information about the kinds and types of activities/initiatives partners are working on together, when and how those partnerships were formed, and what outcomes have been a result of those partnerships. If there is something specific you want to know about the partnerships in your network, ask it as a relational question.
8. PILOT BEFORE LAUNCHING!
It is always a good idea to do a pilot survey before launching. This is a good way to get feedback from key stakeholders on the content of the survey before sending to the network. Piloting a survey is also a great way to get some data that you as the manager can upload into the PARTNER tool and play around with.
That’s it! You’re ready!
Once you’ve developed your survey, you’re ready to send it to your respondents and start collecting data. You can learn more about purchasing or using the PARTNER Tool survey here. We also offer a series of workshops designed to help you through the PARTNER process from start to finish, you can find training info here. Be sure to check back in for our future posts in this Tool Tip series: tips for administering your survey, analyzing your data, and planning future analysis.